This article is one in a series to setup and configure ADFS 2.0 for a SharePoint 2013 farm. In this post we’ll walk through the procedures to setup a Certificate Authority (CA) by provisioning the Active Directory Certificate Services role. This is necessary because ADFS uses certificates for the purpose of encrypting and signing SAML tokens. In production you may opt to use 3rd Party Certificates from a trusted issuer and in a lab setup you may opt to use the the self-signed certificates that ADFS will provide in the absence of a certificate being available during the installation process.
- SharePoint 2013 and ADFS 2.0 Installation Guide
- Lab Environment
- Install Windows Certificate Authority
- ADFS Prerequisites
- How to Install and Configure ADFS 2.0
- Configure User Profile Service for ADFS 2.0
- Configure Search to Crawl Web Applications Using Claims and ADFS 2.0
- Configure People Picker to resolve ADFS Identities
- Adding Host Name Site Collections to Existing Web Application Configured to use ADFS 2.0
- Validate Configuration with “Claims Viewer Web Part”
Select Server
This post in no way is intended to outline how you would setup a CA for production use, but will instead guide you through the installation for a lab environment. The lab used for this blog series includes the following machines:
- DC1 – Windows 2008 R2 Standard Domain Controller
- SQL1 – SQL 2012 Server Enterprise
- SP-APP-1 – SharePoint 2013 Application Server
- SP-WFE-1 – SharePoint 2013 Web Front End Server
- SP-Win7-01 – Windows 7 Professional
In this example we’ll provision the Active Directory Certificate Services role on DC1.
Install Active Directory Certificate Services
- Launch Server Manager
- Click “Roles” in the left hand pane
- Click the “Add Roles” link on the right hand side of the page
- On the “Before You Begin” page click “Next >”
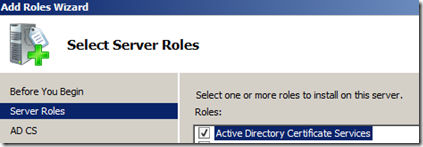
- Select the “Active Directory Certificate Services” option and click “Next >”
- Click “Next >” on the “Introduction to Active Directory Certificate Services” screen
- On the “Select Role Services” screen select both the “Certification Authority” and “Certification Authority Web Enrollment” options and click “Next >”
- On the “Specify Setup Type” screen select the “Enterprise” option and click “Next >” to continue
- On the “Specify CA Type” screen select the “Root CA” option and click “Next >”
- On the “Set Up Private Key” screen select the “Create a new private key” option and click “Next >”
- On the “Configure Cryptography for CA” screen accept the defaults and click “Next >”
- On the “Configure CA Name” screen select a common name and click “Next >”
- On the “Set Validity Period” screen accept the default of 5 years and click “Next >”
- On the “Configure Certificate Database” screen accept the default location of the database and log files and click “Next >”
- On the “Confirm Installation Selections” screen review the settings and click “Install” to begin provisioning the CA.
- On the “Installation Results” screen verify the components were successfully installed and click “Close”
Verify Installation
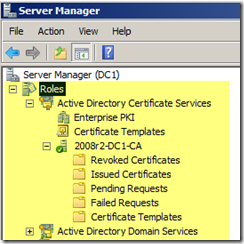
Now that the “Active Directory Certificate Services” role has been provisioned on the “DC1” domain controller we can verify it’s installed in “Server Manager”:


Leave a comment